Easy simple mehndi designs for kids’ step by step tutorial
welcome to mehndiya.com, your ultimate guide to simple and easy mehndi designs.
Let me guess,you might be totally new to mehndi designs and don’t know much how to apply as a beginner but an event has just arrived,having no one to help you out in applying mehndi designs is making you frustated.
Here is the solution, my dear reader, I have provided for you easy simple mehndi designs for kids’ step by step turtorial and you can apply mehndi with no efforts.
lets get started.
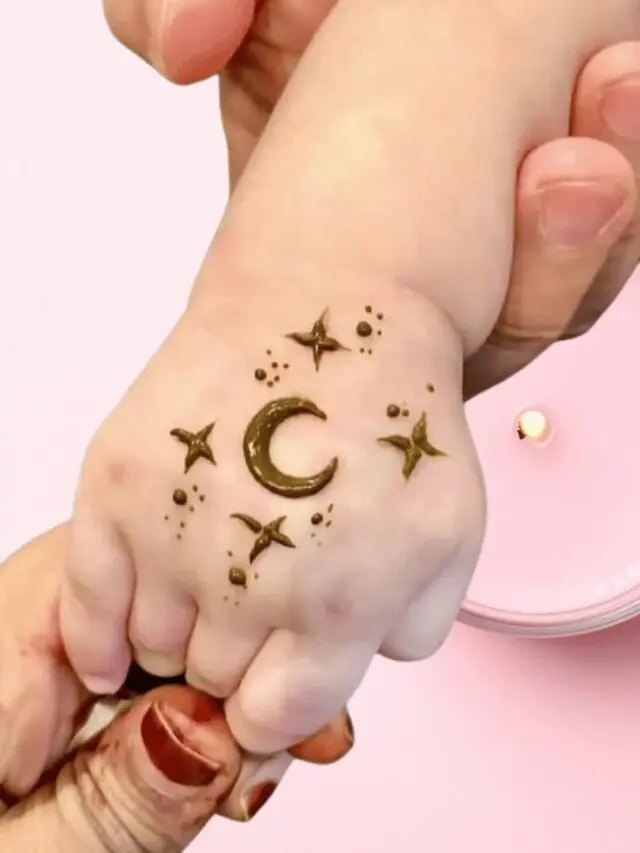
easy simple mehndi designs for kids
Here are some simple designs for the kids, and here is the step by step tutorial for a beautiful and simple design for kids backhand.
Simple mehndi designs for kids (step by step tutorial)
How to apply mehndi designs?
Step 1 : Select best cone
Select the cone, test it on paper or any tissue and test on small portion either it is easy to come out or not.
Step 2: Skin patch Test ( Check allergy)
Test the henna or cone on a small portion of henna and test either it is good for your skin or not, Redness of the skin or allergy and itchy feeling means you should discard the cone and use any other one.
Bonus tip: Avoid black henna
Black henna causes cancer and is toxic for skin, so avoid to apply ,prefer the natural henna.
Step 3 : Select designs accoring to event
select the design you want to apply and start testing it , lets go further and learn our first design.
Tutorial for kids simple flower design on backhand ( step by step)
This is beautiful flower easy and simple mehndi design for kids tutorial you would love.
Step no 1 : select flower you want for backhand

Step no 2
photo shows step by step process for 6 steps to apply petal mehndi designs ,
- In the step 1 for flower design start by a simple patel or a leaf.
- Then add two leaves on the sides
- And at the step no 3 add more leaves till flower grows in shape.
- In Step number 4 make leaf on the downside and its almost complete
- Finally in step 5 and 6 complete the flower and fill the flower with henna as shown in image.
- Try it on paper before applying it on hand.
- It is complete beautiful, flower design.

Simple mehndi design for kids hand Tutorial #2
Here we are going to apply the simple mehndi designs for kids design No 2 with step by step tutorial.
Here is the design we are going to learn, I am assuming you have Tissue paper,cone already collected for you.

To make this flower on backhand is really easy and simple process.

Step by step tutorial for simple kids’ mehndi designs
- As shown in image start by making small circles as shown in image
- Start making petals or leaves around the cirlce .
- Fill the blank leaves petal space by applying fine lines in leaves.
- Now after completing flowers apply dots as shown in image above, and complete the design look.
- We are ready to go.


In this youtube video you can check more simple kids designs Ideas, and take inspiration.
Bonus tip:
Start by easy design,and gradully move towards the complex designs. You can check more simple mehndi designs for kids here or for more designs of all events you can visit mehndiya,com and enjoy the latest mehndi designs for every event.


 12")
 , cartoons,flowers,stars,leafy cute designs 13")
 14")

loved the designs, tried one of the design for my sister hand ,and it was so beautiful. thank you